 This
picture of the pilot's left side panel shows the new throttle, pedal adjustment,
and the revised flap handle. Moving the instrument panel forward 4° allowed space to move the throttle forward . This
seemed to me to be a comfortable position and allowed more space between the new diameter trim wheel and the
throttle.
This
picture of the pilot's left side panel shows the new throttle, pedal adjustment,
and the revised flap handle. Moving the instrument panel forward 4° allowed space to move the throttle forward . This
seemed to me to be a comfortable position and allowed more space between the new diameter trim wheel and the
throttle.
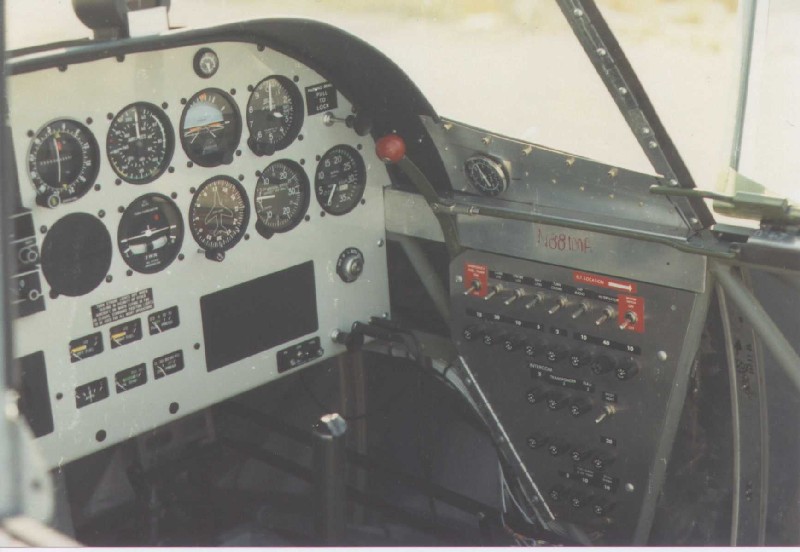 This right side interior photo shows
some of the new instrument panel, the glare shield left by moving the instrument panel forward 4 inches, the location of the cabin air
inlet and the revised switch/fuse panel layout. The cabin air inlet location was changed to avoid cutting holes in the canopy
glass. The new position on both sides of the glare shield turned out to provide very good air flow to the pilot
and even a little to the passenger. The switch panel shape was changed to allow a hinge attachment so that the panel could swing
in to allow for changes or maintenance without removing the exterior side panel. The fuses were to be replaced with circuit
breakers at a later time, but I never got to it. The handle with the red knob was for canopy ejection.
This right side interior photo shows
some of the new instrument panel, the glare shield left by moving the instrument panel forward 4 inches, the location of the cabin air
inlet and the revised switch/fuse panel layout. The cabin air inlet location was changed to avoid cutting holes in the canopy
glass. The new position on both sides of the glare shield turned out to provide very good air flow to the pilot
and even a little to the passenger. The switch panel shape was changed to allow a hinge attachment so that the panel could swing
in to allow for changes or maintenance without removing the exterior side panel. The fuses were to be replaced with circuit
breakers at a later time, but I never got to it. The handle with the red knob was for canopy ejection.
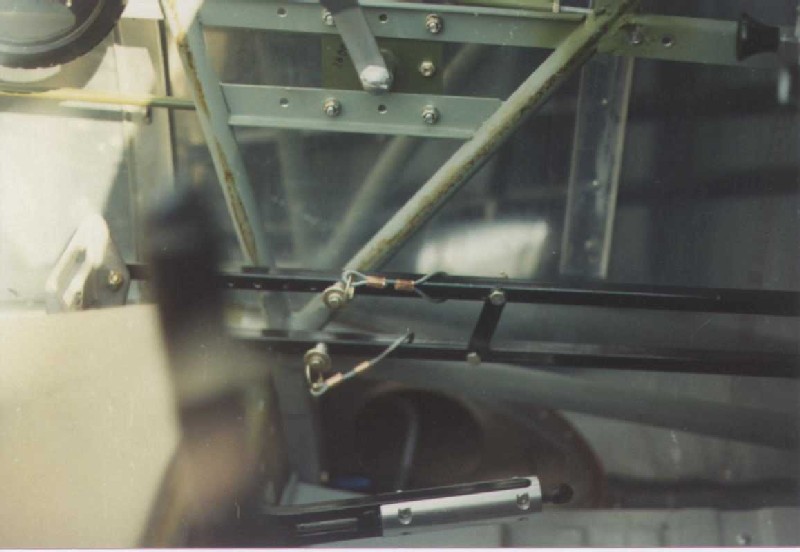
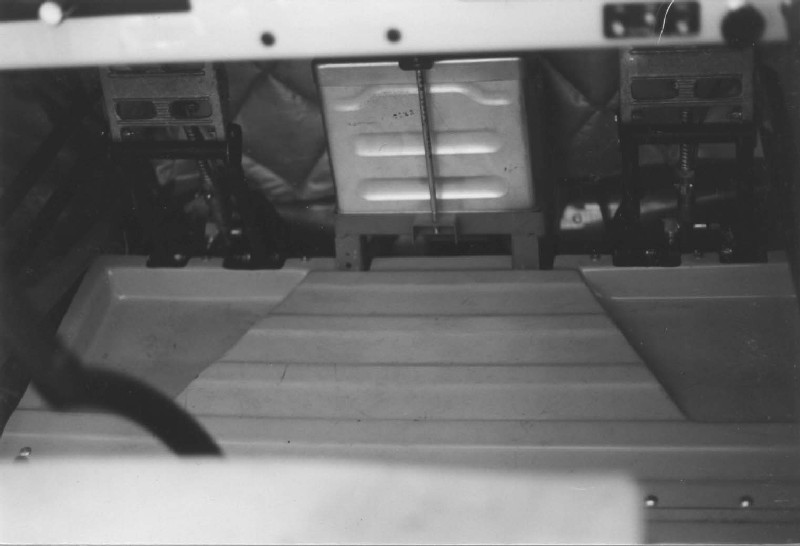 This photo of the
pilot's floor shows the relocation of the
fuselage truss side load diagonal members (to below the floor) and the two piece fiberglass floor panel with heel wells.
This photo of the
pilot's floor shows the relocation of the
fuselage truss side load diagonal members (to below the floor) and the two piece fiberglass floor panel with heel wells.
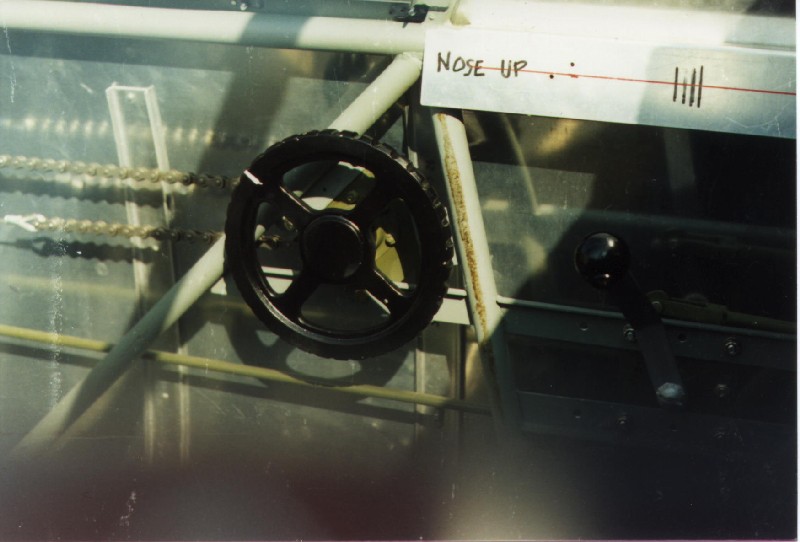 The
drive sprocket on the Montanair elevator trim control was reduced from a 14 tooth to a 10
tooth sprocket and the added trim wheel has a 3" radius instead of the
2" handle on the Varga. This reduces the force required for pitch
trim (especially nose down) and makes finer trim adjustments easier.
One negative consequence of these changes is that it is now possible to turn the
handle 360 degrees which makes a separate trim indicator desirable.
The
drive sprocket on the Montanair elevator trim control was reduced from a 14 tooth to a 10
tooth sprocket and the added trim wheel has a 3" radius instead of the
2" handle on the Varga. This reduces the force required for pitch
trim (especially nose down) and makes finer trim adjustments easier.
One negative consequence of these changes is that it is now possible to turn the
handle 360 degrees which makes a separate trim indicator desirable.